


Landscape

For my scrolling landscape in the distance, i had long planes with a scrolling diffuse texture of some low res tree lines. I changed the heights and lengths of the planes to make them appear moving at different speeds and at different distances.

I also had some prefabs of tree groups on seperate planes, that at certain durations scroll across the landscape using matinee

For the actual terrain, a stretched normal map pans across the ground, with colours and spec applied in the material editor

For a simple illusion of some tracks, a diffuse and normal pan quickly, at different speeds, to fake the appearance of the train in movement. I used some decals, with a shadow texture, to fake a train shadow, and blend in where the tracks meet the grass.

My skydome was a combination of painting and smudging, and adding gradients to get the colours right. I took lots of photos in the first year of sunrises and sunsets from my kitchen window. Combining many of these helped, although i did find i had to paint over lots of clouds, as they're only 180 degree panoramas, and clouds were lit from behind rather than the front


Glassware

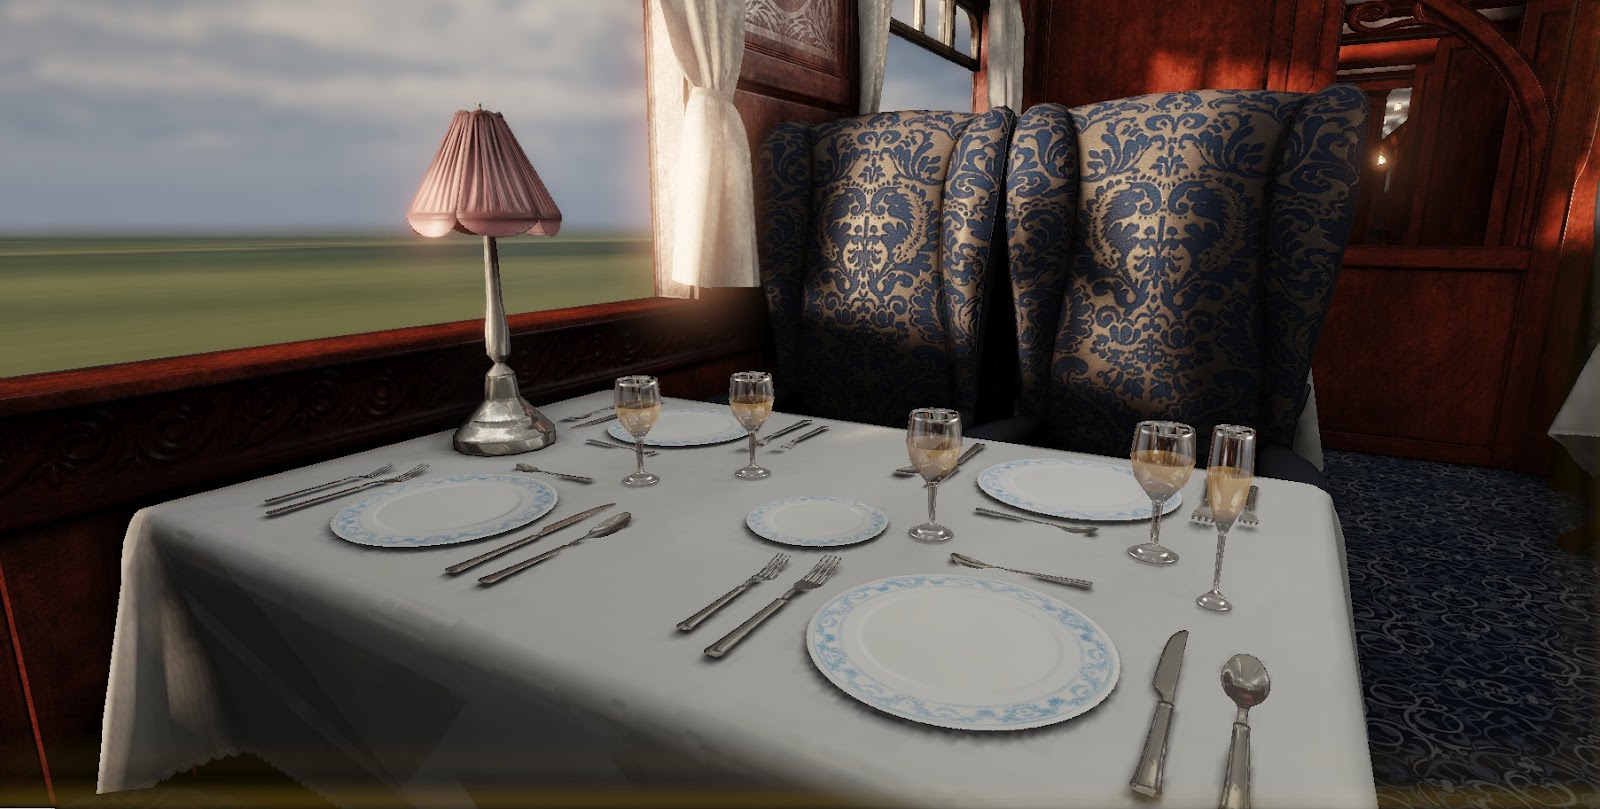
To create the material for all of my glassware, i went a bit crazy with the shader, but it was really rewarding when i got it to work. What it does is, uses reflection and refraction to sell the glass material, which is very tweakable.Then using vertex painting you can choose whther the glass is empty or is filled with drink. Then you have a choice of red wine or champagne. So each glass can have 3 states, empty, red wine or champers, and the same material could be applied to several differnt glass assets by making the shader a parent material. The difference in the material instances is a very small normal map, very small, with a mask in the blue channel, which dictates the position of the liquid.

The initial part of the shader, the reflection and refraction, is from a tutorial
You create two small cubemaps, and with the second one, change the coordinates of each face of the cube so that the whole thing is inverted

The meshes themselves were cyllindraclly unwrapped, which is very important for the normal map to do its magic. For the normal, I made some bevels in and out with ndo, and moved them about and blurred them to get the right shape for whichever glass asset it was going on. In this case, whe wine glass, there are soft curves to define the top and bottom of the glass, to kill any hard edges, and an indent at the top of the neck of the glass. In the blue channel, the mask is applied, where white dictates where the liquid will be. Because thsi tiles horizontally, i could afford to make this texture 128x2 pixels, which is ridiculously small filewise. This then wraps around the glass.


The normal map works as usual, powered up a bit, and inserted as a param2d texture sample to allow for material instances. The first question that the shader asks is whether anything is in the glass. By vertex painting the blend weights of the alpha channel in the first vertex colour, you can decide this. If it is full, it goes to the next stage..

The area named mask control takes the normal map mask into account. I never really understood why i had to invert the mask with a one minus but it worked so i didn't change it. The default full glass was wine, so by painting any full glass in the scene with the red channel in vertex painting, i could turn wine into champagne. Much thanks to Kris for helping me get the wine right, still don't know why it has to be green when the champagne works okay as it is.

To make champagne flutes, i just rescaled my wine glass x and y. Also to make my plates and cutlery pop a bit more, they're elevated to cast a little shadow on the table below
Dining assets


Made a plate in max, high polly'd, to be baked onto an alpha plane. Thought high poly would give better results than ndo and was quick anyway. With the normal map, i surrounded it in a mask and put it in the blue channel for use in UDK. For the pattern detail, i used my pattern texture i've used on alot of other things, picked a few that looked nice and arranged them into a quarter circle. In UDK, i told the texture to mirror in adress X and Y, so i could afford a bit more detail in the diffuse

I made some high poly cutlery to go through the same process of baking onto an alpha plane. I made one handle and copied it for each piece. The fork and knife were pretty tricky to get right but was pleased with the outcome

The bake onto the planes was suprisingly successful, as it kept quite alot of the detail. I added some edges in the planes to define the shapes alittle more, and I hid the mask in the blue channel once again,

I arranged them to how they would sit on my tables, and grouped them as one mesh to save on the number of material calls. The small cubemap finally sold the effect completely

Orchid

Quickly high polly'd a simple art decoish style vase, and then created an alpha diffuse with one petal, a few buds and some stem. I arranged the petals to make one orchid flower, and then copied them around the plant till i got the right shape

To get a bit more variation, i used vertex painting in the material editor in UDK. This made all the petals a light blueish/white, and i could paint splashes of pink onto petals where i wanted. I made the petal material unlit, as it gave better results, and as a bonus i didn't have to lightmap each individual petal. But the vase is lightmapped. Fun little asset to create, wish i'd given myself more time to do more stuff like this

+ small cubemap on the vase
Bed

I made some elements of my bed, like the matress and pillow a long long time ago, shown in a previous post. Because the blanket was dropped using cloth modifier onto a bed without any walls to limit its fall, that part had to be redone.The retopologising was a bit painful, as I wanted to keep some of the shape of the folds with geometry, but sell the rest with normals and AO. From some angles it really works, but others it doesn't.


I struggled getting a nice fine linen look for the white fabrics. Playing with spec, even slightly, gave it a kind of latexey look, and making it brighter kind of lost a lot of shadow detail. Was never entirely happy with it but all of its elements to create it took a while so i had to move on
Subscribe to:
Posts (Atom)