Dimensions

 Many of the dimensions I knew of the carriages were in imperial units, so it was more than straightforward to use the generic UDK units. I knew space was going to be tight however, so I went and started building the basics of my shell with 1ft x 1ft tiles with collision, to see if the character could actually navigate around the carriages. The checkerbox appearance of the tiles next to eachother also made it easier to count how many feet long a certain area was, and i could easily halve a tile to make 6 inches, or 3 inches etc.

UDK Units  =  Imperial
16   =  1ft
8  =  6"
4  =  3"
2  =  1.5"
1  =  0.75"

The first big problem i encountered were the width of the doors. Based on blueprints and from reference, the doors are about 2 feet wide. As soon as I tested this in UDK, I realised that the character would not fit though the doors, and only three feet wide was sufficient birth, with about 2 inches leeway (enough to fit in the width of an open door). The first thing i didn't like about making the doors a foot wider was the visual appearance. The cabin doors in reality do look tall and narrow, which i think is part of their elegance and charm, but if they won't work in game then i have to make them wider. Unfortunately this meant having to make each cabin a foot longer, as the 3 feet required for the bed and the 2 feet required for the wash cabinet couldn't be touched. It does at least give the player/camera a bit more room to look around with.


 Obviously, with the discovery of gaps having to be 3ft wide, other areas were also going to need to be ammended. For example, part of the wall that was the same length as a door when it is open, had to be made a foot longer. The gaps between diagonal pieces had to be adjusted, and even places where locked/static doors were placed had to be made wider just to flow with the overall scale of pieces. Working in UDK first this way was such a big help, much better than working in max first, exporting assets, finding out they're wrong, going back and forth..


Plans

To start things off, I began with a few basic sketches, scanned them in and then started working in photoshop because the result looked a whole lot cleaner. The 'shell' of each carriage will be similar, although often using different modular pieces depending on which carriage or which part of the carriage.


 Every carriage will start and end the same, with an identicle vestibule linking the two, featuring the doors that would be used to step out onto the platform(although not accessible). These areas will be joined by an enclosed walkway.


The restaurant cars will feature tables for two and tables for four, and the carriage will be split down the middle by a divide. The modular pieces and furnishings for the diner will be versatile, so it should be easy to make variations of the car, like maybe having private dining compartments.


 My first design for the sleeper car just featured rooms that were mirrored, but i found it a bit dull in comparison to the other designs I'd looked at, plus they didn't match some of my favourite reference images.


I figured that with this more interesting design, rooms could be more varying, and the result wouldn't be too hard to achieve, which I had initially thought. As long as I planned my modular pieces better, most of the assets and wall panels could be flipped and rotated to still achieve a nice result.


For the coridoor carriage, with public seating compartments, the planning was pretty much a copy of original blueprints but fit within the original dimensions of my carriage. I've been in three minds whether to continue with this carriage(as they don't really exist on these trains), or wether to do a parlour car/piano lounge. I think both would take about the same amount of time to complete, but I'm also unsure whether or not to scrap this extra carriage completely considering I still want to do my scrolling exterior scene


CHANEL N°5

I found the making of the latest Chanel advert to be really inspirational. It's really helped not only with planning the layouts, but also given me a good idea with some of the visuals I may be able to achieve when completed


Video Reference

These videos really helped with the planning of my layouts, especially the first one. Trying to figure out where certain doors were, which way they opened, how big distances between doors needed to be etc, alot of things that i couldn't judge just from the top down diagrams. The last one from Blue Peter was really helpful with regard to the sleeper cabins, but eventually had to start muting it, it was too annoying


Sleepers

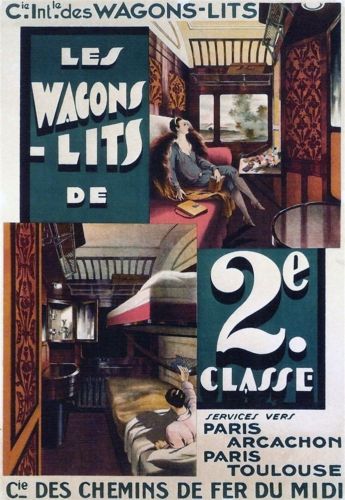
I really struggled at first to find decent reference for the sleeper cabins, and was unsure of how they worked in such a tight space. Some of the images i eventually did find really helped me figure out what would work with the modular workflow I'm using. This will be explained in more detail with the actual build of the cabins.


Some more restaurant car reference


Some of the better images I have found on the web and from library books, that I have been using to decide on an overall style of my carriages and the furnishings inside the reastaurant cars


Blueprints

To begin realising my plans for the layouts of the carriages I'm creating, I headed to the library to get as much material as I could find. Unfortunately there were no books specifically with diagrams of wagons-lits carriages, the best I found were general layouts of British carriages, but some of the images were helpful in explaining basic layouts.
Railway Carriages and Wagons, Theories and Practices - L. Lynes

 
Browsing the web I found more plans that were more in tune with the carriages I wanted. I found slight variations in the sleeper car designs which would have to be adressed when I did my plans, considering what pieces would be reusable and what would add some nice variety to the repetitive nature of the repeating rooms.


This image was helpful in figuring out some of the important dimensions of the carriage, like the overall width being about 10 ft, the differing widths of aisles and doorways etc. Something that would be considered when building my blockout to allow the player to navigate through the train without getting stuck.